
Gup Certificates Printing Guide
The following article covers printing Gup certificates from the Submit Group Gup Test Recommendations page.
Requirements
Before you can print certificates, you will need the following:
- Official Gup certificate paper;
- Adobe Acrobat Reader—a free download from the Adobe website available for Mac and Windows.
Printing Instructions
Create certificates for students by filling in the test recommendation form on the Submit Group Gup Test Recommendations page. Once you have created one or more entries, they will be displayed below the form.
Approved entries will have a Certificate button in the row that looks like this:
![]()
Clicking the button will open a dialog with multiple options.
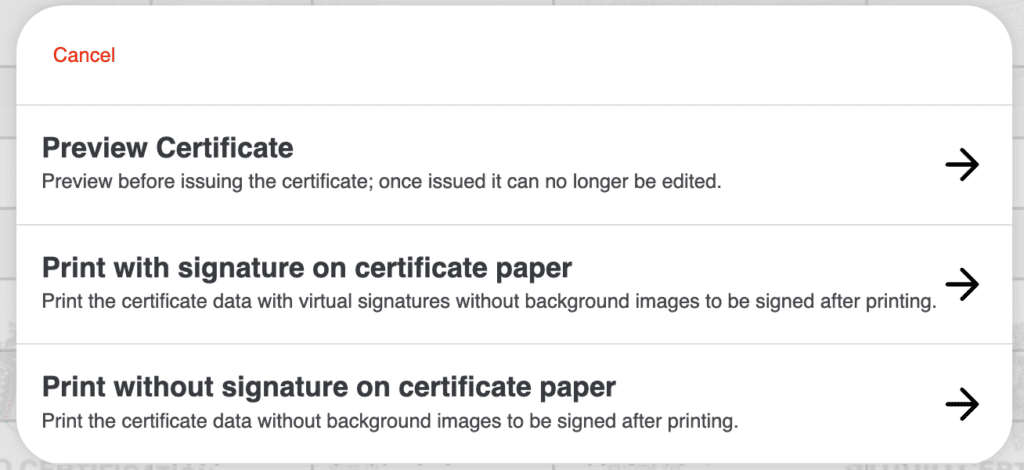
The Preview Certificate option will allow you to see a watermarked sample of the certificate without finalizing the entry. You can still edit the entry to correct names, dates, etc.
The Print with signature on certificate paper option will generate a PDF file containing the certificate details but no imagery already present on the certificate paper. It will also print a virtual signature or your signature that you uploaded when creating the entries. Once confirmed, you will no longer be able to edit the entry.
The Print without signature on certificate paper option does the same as the previous option but leaves off the signature so that you can sign your certificates by hand.
Both printing choices will allow you to download a preview to run a test print before printing the final certificate.
Printer Tests
The following orientation and alignment tests will ensure that your certificates will be printed correctly. You only need to carry out each test once, all generated certificate files use the same orientation and dimensions.
Orientation Test Printing
After clicking the Certificate button, choose “Preview Certificate” and download the preview file—a PDF with TEST PRINT watermarked across the file—open it in Adobe Acrobat Reader and open the Print dialog (File > Print on Mac, Menu > Print on Windows).
In the Print dialog, make sure that “Actual Size” and “Choose paper source by PDF page size” are selected.
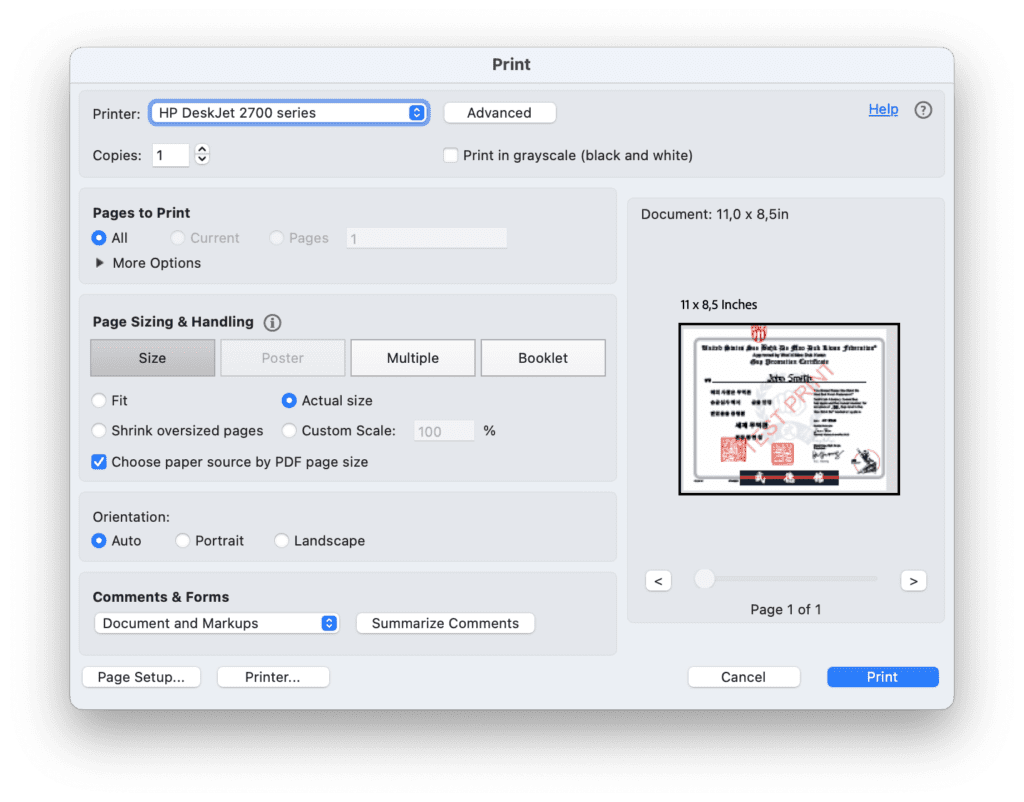
Print a copy on blank paper and pay attention to the orientation of the print when it comes out of the printer. You should insert the certificate paper so that it will come out the printer in the same way.
Alignment Test Printing
After having determined the paper orientation, it is recommended to do an alignment test by first making a photocopy of one of the official Gup certificates and printing the certificate–this time using the actual certificate details rather than the TEST PRINT file — onto the photocopy. This ensures that the certificate details line up correctly on the certificate paper without wasting the original certificates.
- Ensure that the details on the certificate you are about to print is correct.
- Make a photocopy of a certificate paper, be careful to use the same size paper to avoid alignment issues.
- Insert the paper with the orientation determined in the previous test.
- Choose either of the printing options and continue to the step “Certificate Preview”.
- Download the preview by clicking the “Open Preview” button.
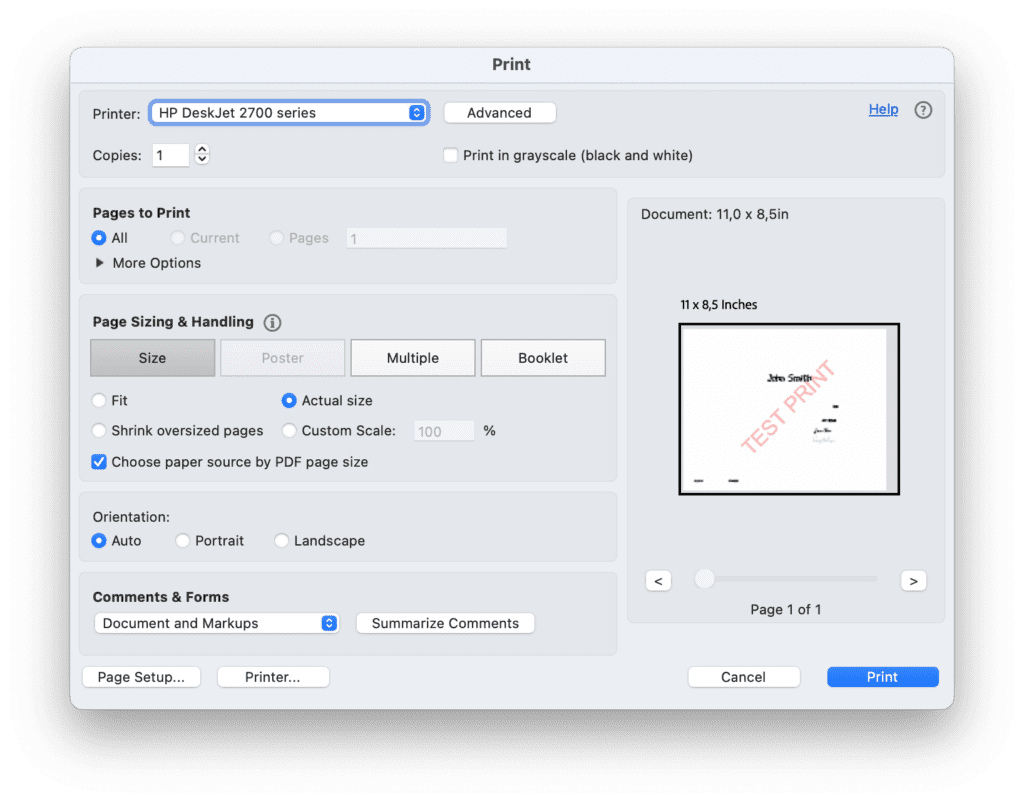
- Open the file in Adobe Acrobat Reader and print with the same options as the previous test. Your preview window should look like the following:

Required print settings for the alignment test. - Print the file and verify that it aligns correctly on the certificate paper.
You should now have a successfully aligned test print on the certificate paper copy. Make note of the orientation and start printing with the real certificate paper.
Printing on the official paper requires entering the certificate numbers found in the bottom right corner. These cannot be changed or reissued once used.